Showing posts with label Valentine's Day theme. Show all posts
Friday, February 17, 2012
Sunday, February 5, 2012
It is February...
and everybody is already talking about Valentine's Day. ❤
I was grocery shopping the other day and saw this:
And for all those who are irritated whenever people post lovey-dovey stuff, go find love! :P haha!
I was grocery shopping the other day and saw this:
Pink frosting with fun Valentine's themed sprinkles :P Super cute!
There was a box of chocolate cake mix at home (which explains why I was looking for frosting). I like to try and bake from scratch most of the time but sometimes when I like to just use box mixes because they are super easy and fast to make! :) Am I cheating? O_o
This is how my cupcake turned out:
Maybe I should have been a little more generous with the sprinkles :P
![]() |
| OM NOM NOM NOM |
These were so easy and fun to make! :3
I hope that everybody who is in love is especially excited this month. ❤
Thursday, May 5, 2011
Sunday, February 13, 2011
Valentine's Nails using my $0.67 Nail Polish
Here is my simple nail art design I have on my nails at the moment; ready for valentine's day! :)
I got the Wet n Wild nail color at Target's clearance sale for 67 cents! O_o
I wanted to have a more subtle look on my nails so I erased it all off and painted my tips instead:
1. I started off by applying my base coat.
2. I prepared some nail guide stickers:
3. Slap some nail polish of your choice (in my case, its red) on there:
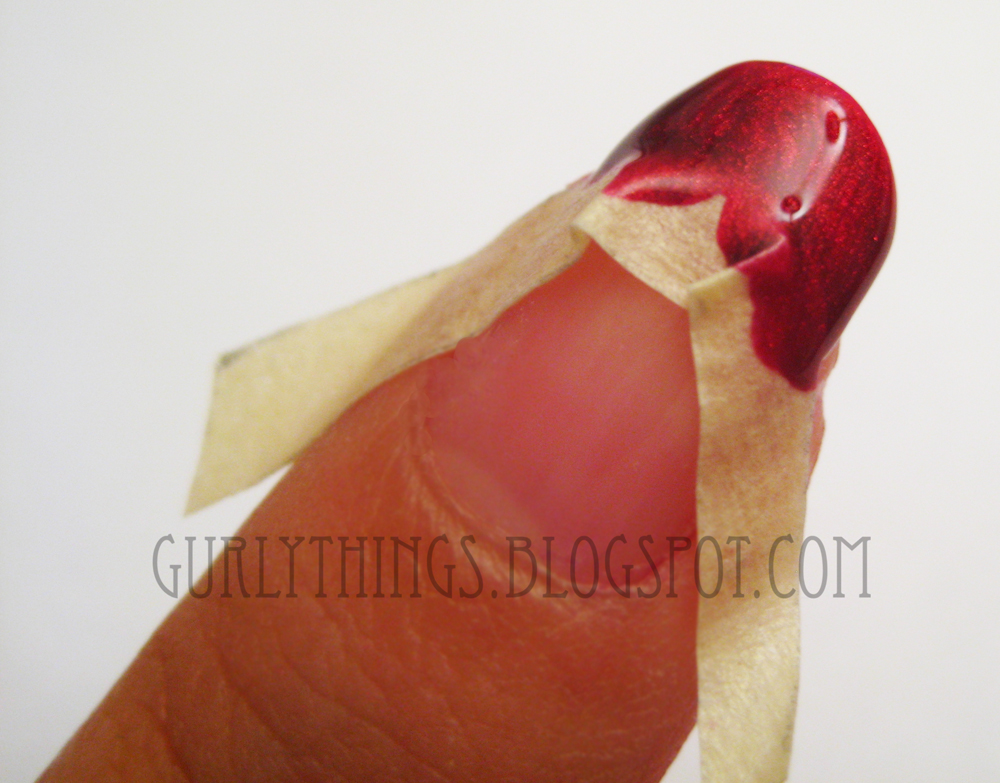
4. Rip off your DIY nail sticker guide off slowly and carefully while it is still wet.
5. Add heart design:
Hope you all have a wonderful Valentine's Day!!! :)
I got the Wet n Wild nail color at Target's clearance sale for 67 cents! O_o
![]() |
| (Wild Shine) in "Burgundy Frost" |
1. I started off by applying my base coat.
| I used "Base Coat Top Coat PRO" by Rimmel |
| So fancy. I like the little crown design on the polish cap. |
| Nice wide brush helps me coat my whole nail in one swipe! |
| I used some masking tape to help me with painting my nail tips. |
| Makes my life easier. |
3. Slap some nail polish of your choice (in my case, its red) on there:
4. Rip off your DIY nail sticker guide off slowly and carefully while it is still wet.
| One done, 9 more to go! |
5. Add heart design:
| Start by adding two dots. |
| Then drag it down one dot at a time. |
| And you have a heart! :) |
| Seal with Top Coat (I used the same Rimmel one again) and you're done! :) |
Also, if you haven't yet, you can still enter for a chance to win a $25 Apothica Giftcard! :)
Giveaway ends on Feb. 14th.
Subscribe to:
Posts (Atom)